Thursday, 19 January 2012

Before and after editing and the process!

I doubled the layer then turned the contrast to the highest number. Then I erase it around the picture to realise the original image and left a white background. 
I doubled the layer then turned the contrast to the highest number. Then I erase it around the picture to realise the original image and left a white background. It was difficult but the result was worth time.
I did this process again by changing the contrast etc.
This image was more difficult to edit as the background was dark in some places and it was a floor shot. But I did the process again and changed the contrast etc.
I feel this image worked the best and i got the best result from doing the contrast changing method.
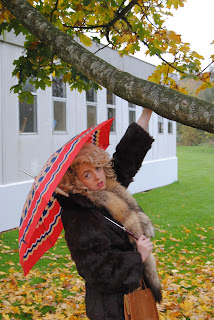
I really like this photo but the only thing that spoils the edit is the ugly building in the background.
But for the editing process I decided I wanted to give it a vintage sort of look to go with the outfits and theme of my photoshoot /magazine article. Firstly I changed the brightness + contrast to 23 to bring out the colour, After this i changed the colour balance with cyan and green to give the photo a vintage look. I then moved the tone slightly down to red to take the blue tint colour from the jacket and tree.

No comments:

Post a Comment